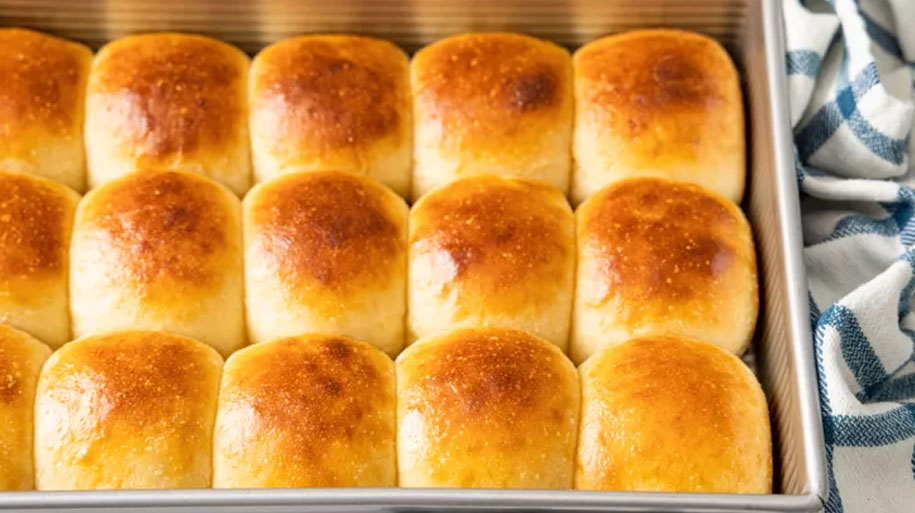
If you’ve been taking care of a sourdough starter for a while, you may be looking for new ways to use it other than your favorite no-knead bread. Or, if you’re lucky enough to have a friend lend you some of their starter, here’s a way to showcase it at your next dinner party. These pull-apart sourdough dinner rolls have a chewy top crust and that tangy sourdough flavor we love so much. They’re sweet and buttery, soft and fluffy. Sourdough dinner rolls are equally at home with pulled pork and pickles at a summer barbecue or soaking up gravy on your Thanksgiving plate.
RELATED: Chicken Alfredo Pizza | Learn Recipe 2023
TABLE OF CONTENTS
●Igredients
●Instructions
●Serve
Ingredients
●1 cup (240ml) whole milk
●1/2 cup (113g) mature sourdough starter (see recipe note)
●6 tablespoons (85g) unsalted butter, room temperature, plus more for pan
●2 tablespoons (25g) sugar
●1 1/2 teaspoons kosher salt
●3 cups (360g) all-purpose flour
For optional wash
●1 large egg or 3 tablespoons whole milk or melted butter
Method
1.Warm the milk:
Heat the milk in the microwave for 30 seconds. It should feel warm to the touch, but not hot. If it’s not warm enough, pop in the microwave again and heat in 15-second intervals.
2.Mix the dough:
To the bowl of a stand mixer fitted with the dough hook attachment, add the warm milk, mature starter, softened butter, sugar, salt, and flour.
Mix on low speed until everything comes together and forms a rough ball, about 1 minute. Increase to medium speed and continue kneading for 7 to 10 minutes until the dough clings to the dough hook. It should be smooth and elastic and pull away from the sides of the bowl—it may still stick to the bottom of the bowl. There’s a magic moment when the sticky goop of wet flour suddenly transforms into a cohesive mass that sticks to itself more than other surfaces. Then, the dough is developed enough for bulk fermentation.
3.Bulk fermentation:
Transfer the dough to a clean large bowl and cover. Allow it to rise at room temperature for about 4 hours until it has noticeably risen, but not necessarily doubled in size. It should be light and airy. If it still looks dense, let it rise for another 30 minutes.
4.Prepare the pan:
Liberally grease a 9×13-inch cake pan with butter.
5.Shape the rolls:
Scrape the dough out of the bowl onto a lightly floured work surface. Use a bench scraper or a sharp knife to divide the dough into 15 equal pieces. Shape each piece into a ball, pinching the seam at the bottom to ensure the top surface is taught. Place the shaped rolls into the greased pan evenly spaced in 3 rows of 5.
If the dough feels too sticky while shaping, instead of sprinkling flour over it, put the dough in the refrigerator for 30 minutes or so. You’ll find that it’s easier to shape cold dough.
6.Proof the rolls:
Cover the pan and set it in a warm spot to rise for about 2 1/2 hours until the rolls have doubled in size and look very puffy. If they haven’t quite risen enough, check back after another 30 minutes.
7.Preheat the oven to 375°F.
Do this about 30 minutes before the rolls are ready to be baked. Arrange a rack in the middle of the oven.
8.Bake the rolls:
Lightly brush the tops of the rolls with a wash, either a beaten egg, whole milk, or melted butter.
Bake the rolls for 20 to 25 minutes, until they’re golden brown on top. An instant thermometer inserted into the center of a roll in the middle of the pan should read 190°F or above.
9.Cool and serve the rolls:
Let the rolls cool in the pan for 5 minutes, then transfer them to a wire rack to cool completely. Serve them warm.
Store any leftover rolls tightly wrapped on the counter for up to 5 days.
Baked rolls can be frozen, wrapped in a layer of plastic, then a layer of aluminum foil, for up to 2 months. Let the rolls thaw at room temperature, still wrapped, for about 1 hour. To serve them warm, reheat them for about 15 minutes in a 325°F oven.

