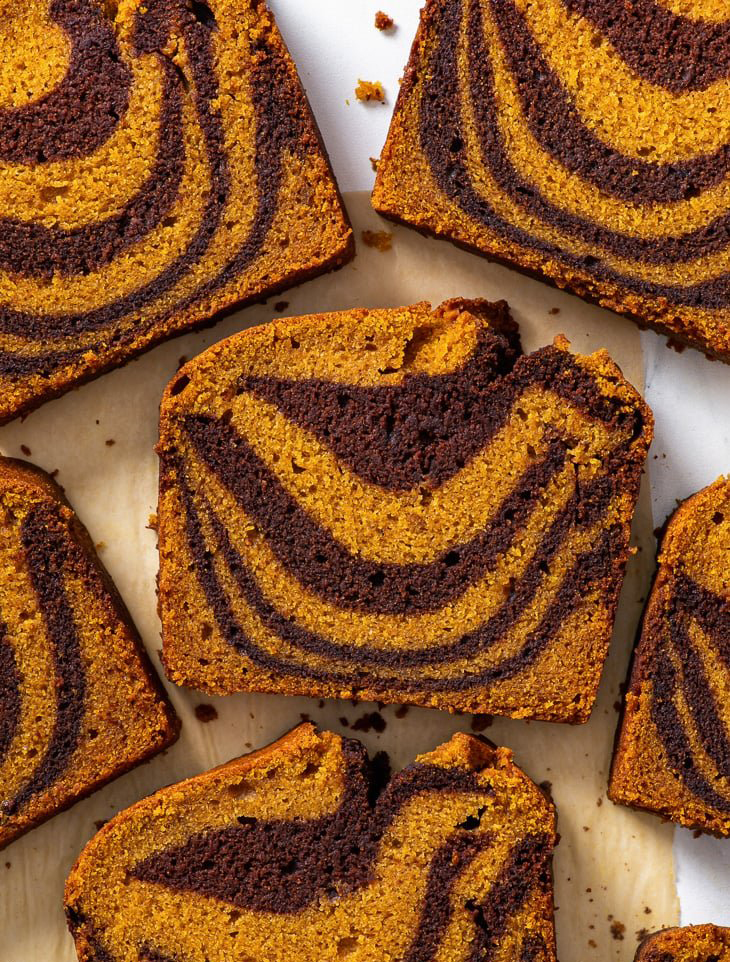
This gluten free pumpkin marble cake is the perfect fall dessert: super easy to make, bursting with flavour and it looks simply stunning. It’s deliciously soft, moist and tender, and it’s packed full of pumpkin puree and warming fall spices. The recipe is absolutely fail-proof, and you don’t even need a stand or a hand mixer to make it!
INGREDIENTS
Pumpkin cake batter:
▢300 g (1½ cups) caster/superfine or granulated sugar
▢170 g (1½ sticks) unsalted butter, melted and cooled until lukewarm
▢340 g (1½ cups) canned pumpkin puree
▢120 g (½ cup) whole, full-fat milk, room temperature
▢2 US large/UK medium eggs, room temperature
▢240 g (2 cups) plain gluten free flour blend (I used Doves Farm Freee plain gluten free flour that doesn’t have any xanthan gum added. You can also mix your own gluten free flour blend using this recipe. Note that for this homemade blend, 1 cup = 150g, so ideally use a kitchen scale for best results.)
▢1½ tsp baking powder
▢1 tsp baking soda
▢½ tsp xanthan gum (Omit if your gluten free flour blend already contains xanthan gum.)
▢½ tsp salt
▢1 tsp ground cinnamon
▢½ tsp ground ginger
▢¼ tsp ground nutmeg
Cocoa batter:
▢20 g (3½ tbsp) Dutch processed cocoa powder, sifted
▢20 g (4 tsp) whole, full-fat milk, room temperature
INSTRUCTIONS
1. Adjust the oven rack to the middle position, pre-heat the oven to 350ºF (180ºC) and line a 2lb/900g (9×5-inch/23x13cm) loaf pan with parchment/baking paper.
Making the pumpkin batter:
1.In a large bowl, whisk together the sugar, melted butter, pumpkin puree, milk and eggs until well combined.
2.In a separate bowl, whisk together the gluten free flour blend, baking powder, baking soda, xanthan gum, salt, cinnamon, ginger and nutmeg.
3.Add the dry ingredients to the wet and, using a large ballon whisk, mix them together until you get a smooth, fairly loose cake batter with no flour clumps.
Making the cocoa batter:
1.Transfer about ⅓ of the pumpkin batter (about 450g) into a separate bowl, and add the cocoa powder and extra milk. Mix until well combined.
Tip: The addition of the extra milk along with the cocoa powder will ensure that the cocoa batter has a similar, loose consistency to the pumpkin batter.
Assembling the cake & creating the marbled effect:
1.Spoon some of the pumpkin batter (about 4-5 generous spoonfuls) into the lined loaf pan, and spread it out into a fairly even layer on the bottom.
2.Create alternating layers of the pumpkin and cocoa batters by topping the pumpkin batter with 3-4 generous spoonfuls of the cocoa batter, followed by 3-4 generous spoonfuls of the pumpkin batter, and so on. (See blog post for photos.)
Tip: In between creating these alternating layers, I recommend gently shaking or jiggling the loaf pan, to help the batter settle and spread into every nook and cranny of the loaf pan.
Gluten Free Pumpkin Marble Cake
3.Continue this process until you’ve used up all of the batter.
Tip 1: There is no exact, set number of layers (or an exact amount of batter per each layer) that you should aim for. The greater the number of layers, the thinner the “zebra stripes” in the final baked cake will be, and the more intricate the marble pattern. I ended up making a total of 9 layers, 5 pumpkin and 4 cocoa ones.
Tip 2: I recommend starting and ending with the pumpkin batter, for the prettiest final result.
4.After you’ve added the final layer of cake batter, gently smooth out the top and shake or jiggle the loaf pan again, to get a nice, even top.
Tip: You don’t need to swirl the batter – as the cake bakes, the batter will rise due to the action of the raising agents, and this will create that gorgeous marbled look you can see in the finished cake in the blog post.
Baking & cooling the cake:
1.Once assembled, bake the cake at 350ºF (180ºC) for about 1 hour 30 minutes – 1 hour 35 minutes, or until well risen, golden brown on top and an inserted toothpick/skewer/cake tester comes out clean or with a few moist crumbs attached.
Due to the long baking time, you’ll need to cover the top of the cake with a sheet of aluminium foil (shiny side up) to prevent it from burning. Cover it once you see it becoming a deep golden brown colour, and then continue baking until done.
2.Once baked, allow the cake to cool in the loaf pan for about 10-15 minutes before transferring it out of the pan and onto a wire rack.
Serving & storage:
1.You can serve the cake either warm or cooled completely to room temperature.
2.The gluten free pumpkin marble cake keeps well in a closed container in a cool dry place for 3-4 days.

